
使用GitHub Actions部署Hexo博客
Updated:
Contents
使用GitHub Actions部署Hexo博客
前言
一直都在用Hexo写博客,但是每次都需要将博客源码拉到本地,然后安装Node.js、Git等环境,之后再写博客就忘了要写什么内容了;
所以这次折腾一下使用GitHub Actions来自动构建和部署Hexo内容。
准备
需要准备两个Git仓库,一个是博客源码仓库,一个是静态页面仓库;参考:使用GitHub Pages托管博客;
博客源码仓库为:
blog,可以为私有的,保护一下私有文件;
静态页面仓库为:xxx.github.io,必须为公开的,存放Hexo生成的静态页面;
开始
生成密钥
bash命令创建一个新的SSH密钥:
$ ssh-keygen -f hexo-deploy-key- 会在当前文件夹下生成两个文件:
hexo-deploy-keyhexo-deploy-key.pub
- 会在当前文件夹下生成两个文件:
登录GitHub网站,找到博客源码仓库;添加新的
Secrets,在:Settings -> Secrets -> Add a new secret:
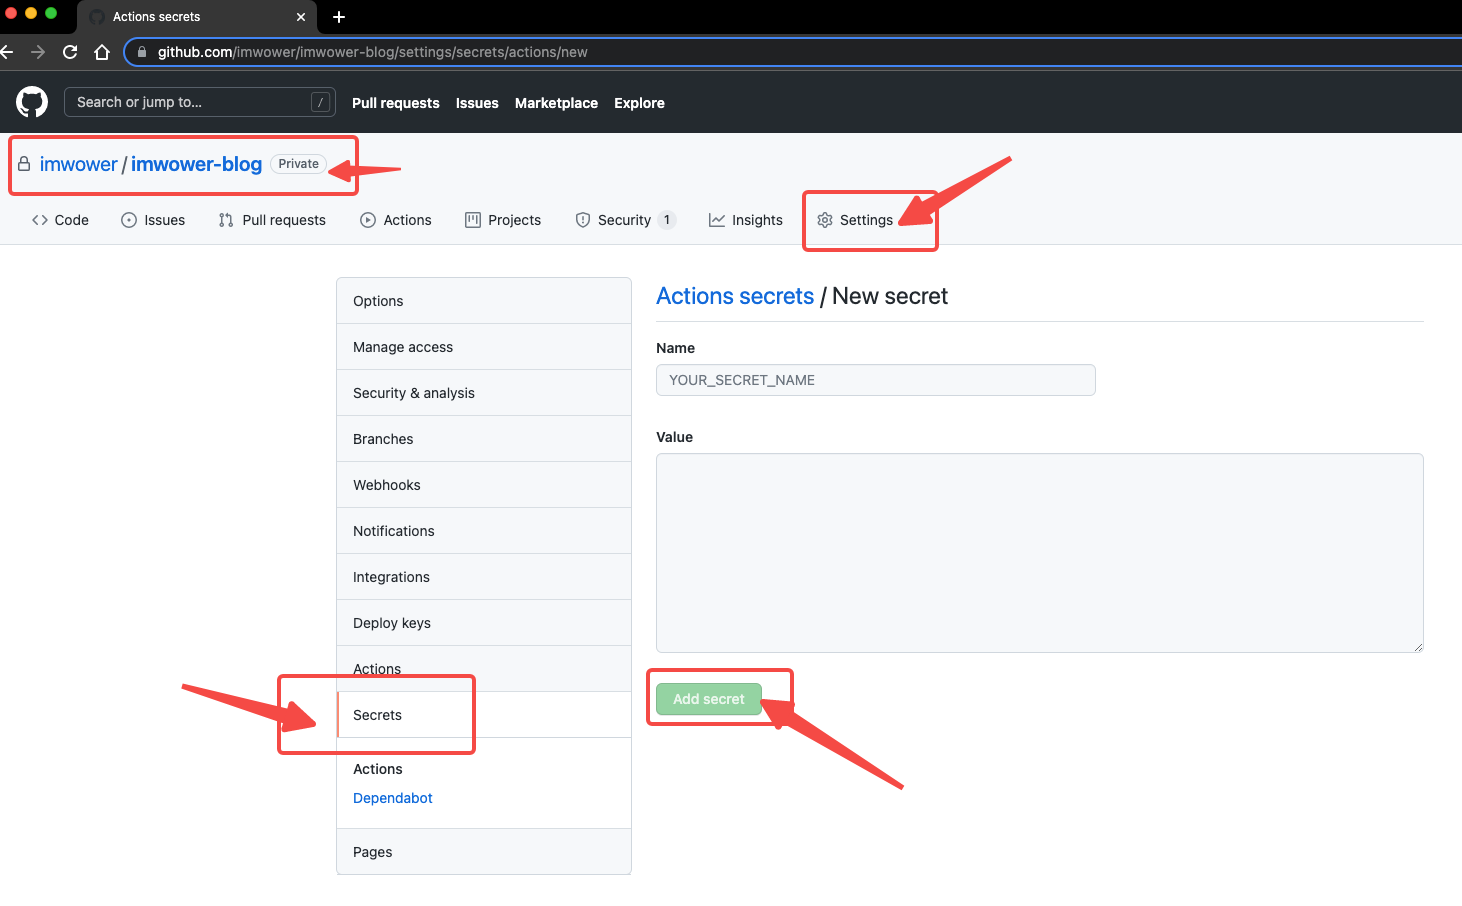
Name填写:HEXO_DEPLOY_SECRET,下边会用到;Value填写:hexo-deploy-key文件中的全部内容;
找到静态页面仓库;添加新的Deploy key,在:
Settings -> Deploy keys -> Add new:
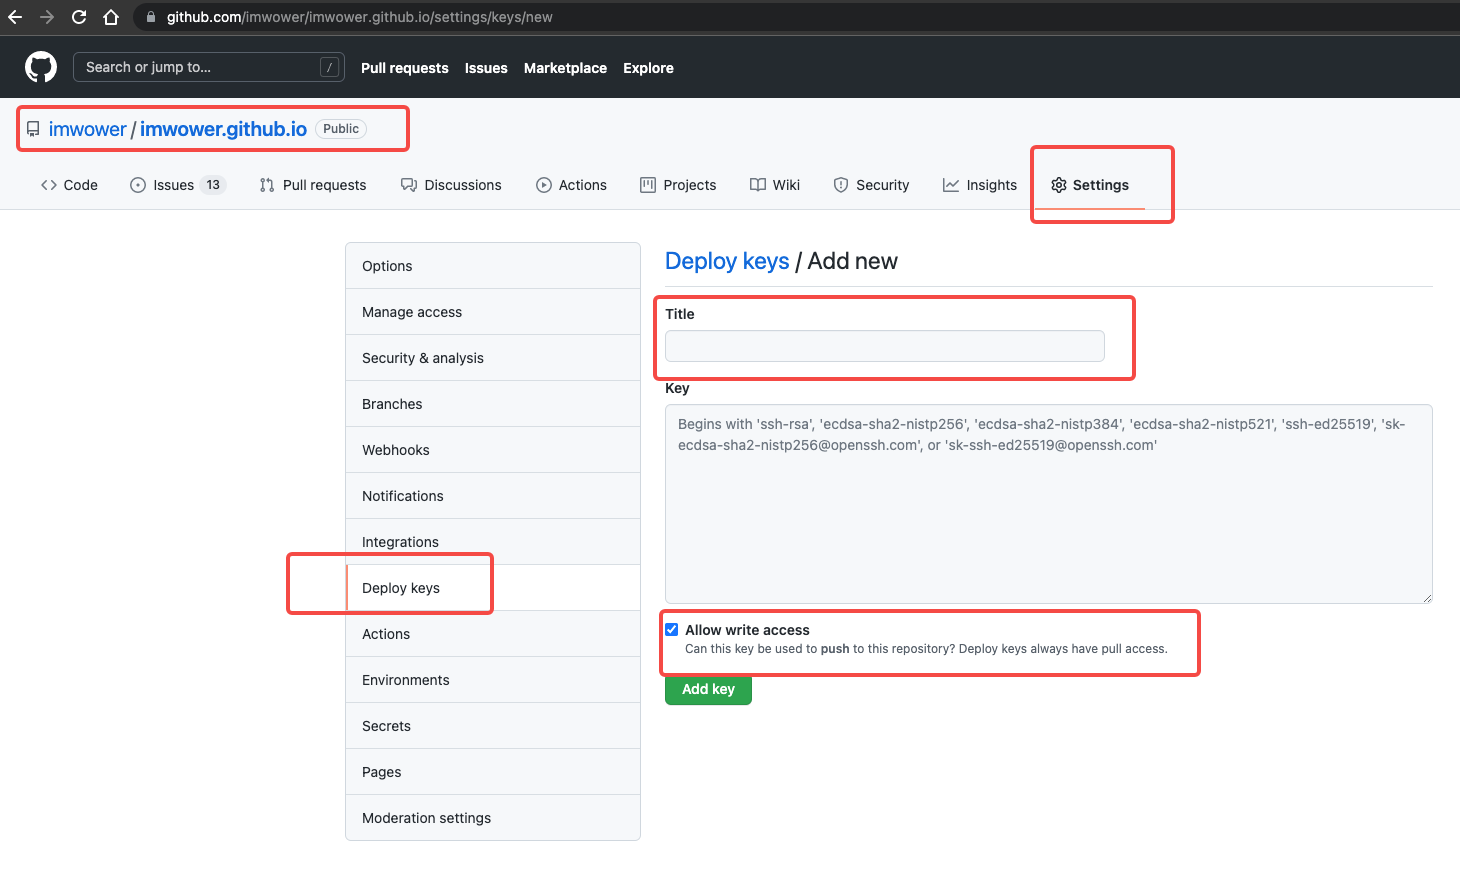
Title随便填写;Value填写:hexo-deploy-key.pub文件中的全部内容;- 勾选“Allow Write Access”;
创建GitHub Actions
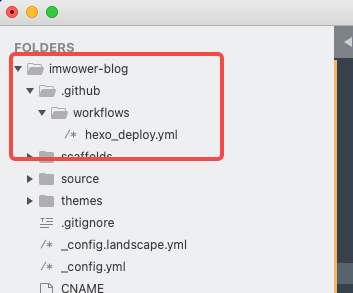
在博客源码仓库根目录下,创建
.github/workflows/hexo_deploy.yml文件;此文件为GitHub Actions所使用的文件;
hexo_deploy.yml文件内容如下:name: HEXO_DEPLOY on: push: branches: - master jobs: build: runs-on: ubuntu-latest steps: - name: Checkout source uses: actions/checkout@v1 with: ref: master - name: Use Node.js ${{ matrix.node_version }} uses: actions/setup-node@v1 with: version: ${{ matrix.node_version }} - name: Setup hexo env: ACTION_DEPLOY_KEY: ${{ secrets.HEXO_DEPLOY_SECRET }} run: | mkdir -p ~/.ssh/ echo "$ACTION_DEPLOY_KEY" > ~/.ssh/id_rsa chmod 600 ~/.ssh/id_rsa ssh-keyscan github.com >> ~/.ssh/known_hosts git config --global user.email "[email protected]" git config --global user.name "im_wower" npm install hexo-cli -g npm install - name: Hexo deploy run: | hexo clean hexo d- name随便写;
- branches为博客源码仓库的分支,即:提交代码到此分支后,会自动触发部署;这里使用的是master分支;
修改博客源码仓库根目录的
_config.yml文件,修改deploy节点为使用SSH的方式:deploy: type: git repo: [email protected]:imwower/imwower.github.io.git branch: master
提交代码
本地或使用GitHub网页版,修改博客源码仓库的文件,并提交到master分支;
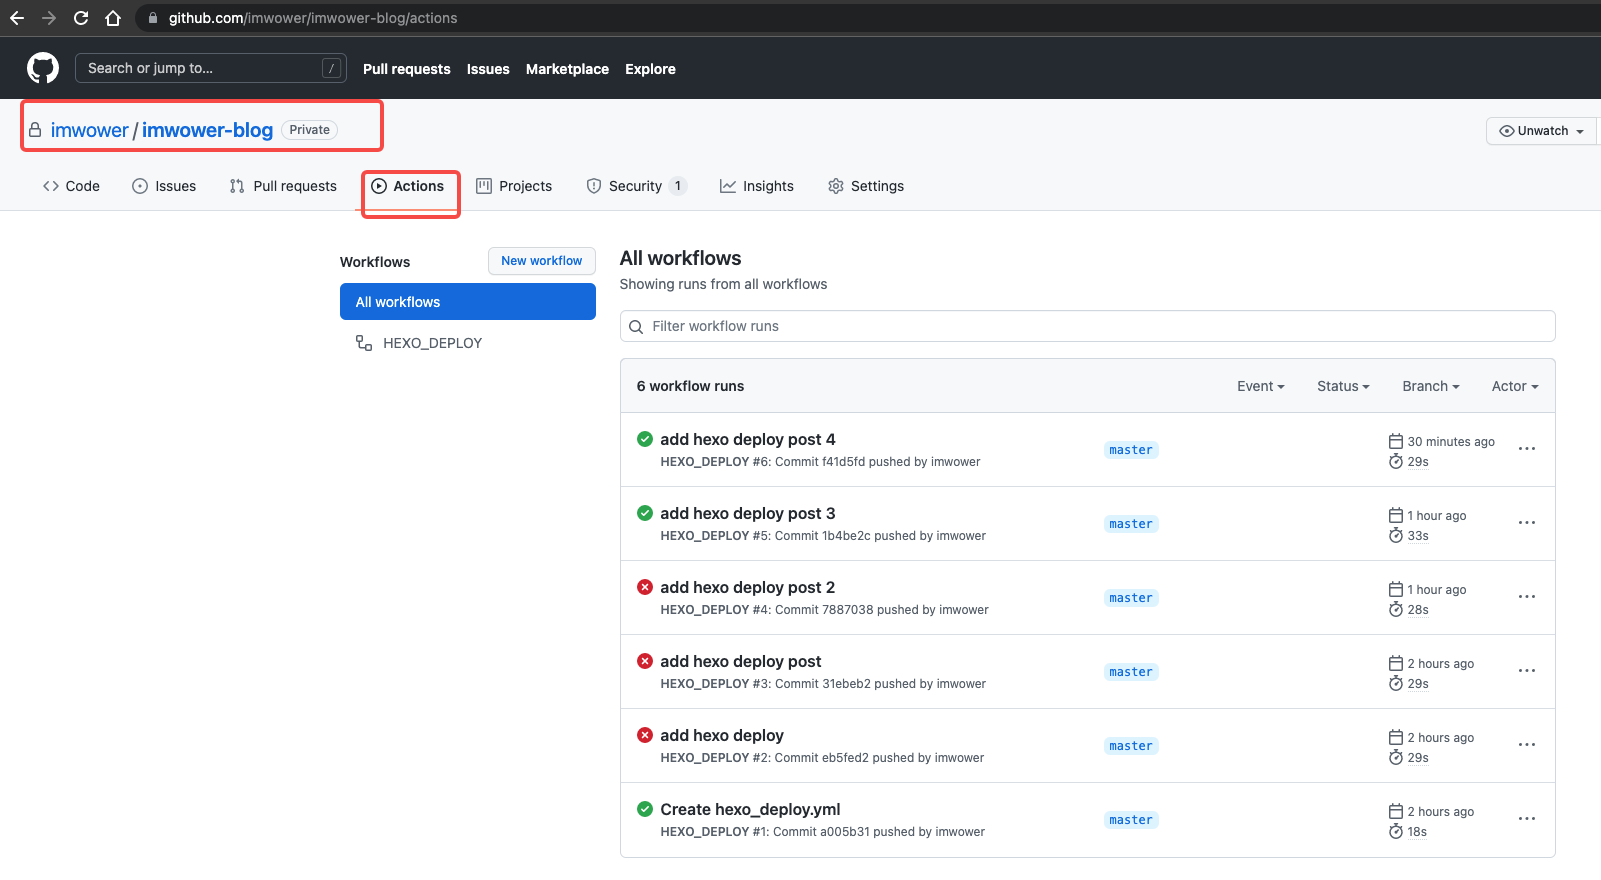
 cd imwower-blog/source/_posts
 touch xxx.md
 git add .
 git commit -m "add new post"
 git push origin
提交代码后,会自动触发部署;登录GitHub查看部署状态:
查看博客:
makefile.so